Managing entries
The Manage menu is where you create, change and remove entries, curate the Quick list, and import many passwords at once from a computer.
New - add an entry by hand
Choose Manage -> New and fill in the fields in turn. You can leave a field and come back by moving the joystick up.
Label
Build the label one character at a time: move left and right to move across the letters, press the joystick to add the highlighted one, and choose [DEL] to remove the last one. Choose a short, descriptive, unique name, then choose [DONE]. If the label is empty or already used, Seclave asks you for a different one.
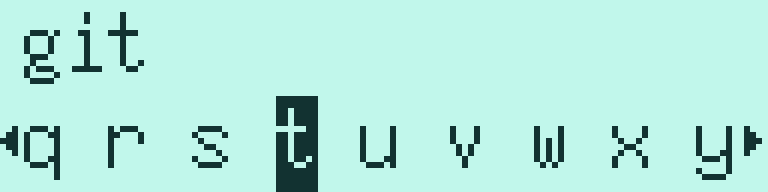
Building a label one character at a time (here git typed so far).
Group
Optionally give the entry a group. Choose New to type a new group name, or Choose to pick one that already exists. Groups make related entries easy to find later. You can change this at any time.
Username
Enter a username (or card number, or similar). While typing you can switch the character set:
[UPPER] - capital letters.
[LOWER] - lowercase letters.
[SYMB.] - digits and special characters.
Note
To type a space, choose [ ], which is available in every set.
Extra info (Optional)
Enter any extra information you want to keep with the entry, such as an account number or a date. This is the Optional field.
Password
Finally, set the password. Choose Enter password to type one yourself the same way as the username, or Generate to have Seclave create a strong one for you. The generators are described in Password generators.
Change - edit an entry
Choose Manage -> Change, pick the entry, and then choose which field to change: Password, Username, Optional, Group or Label. Editing the username, optional, group or label works the same way as when creating the entry.
Updating a password with a safe transition
Changing a password is special, because you often need the old password to still work until the service has accepted the new one. Seclave handles this with a transition state in which both passwords are available.
Choose Password for the entry and set a new password (with Generate or Enter password).
Seclave now keeps both the old and the new password. From this menu you can show either one on the screen, or send either one to the computer, so you can set the new password on the service while still being able to use the old one.
When the change has gone through, choose Done to commit the new password. The old one is then discarded and can no longer be used.
If something goes wrong, choose Abort (or simply move up to back out) to keep the old password and discard the new one.

The transition menu: view either password, then Done to commit or Abort to keep the old one.
Note
The transition lasts only while you stay in this menu. Leaving it with Done keeps the new password; leaving it any other way keeps the old one.
Delete - remove an entry
Choose Manage -> Delete, pick the entry, and confirm to remove it.
Warning
Deleting an entry is permanent and cannot be undone. If you might need it later, take a backup first (see Backup and restore).
Quick - curate the Quick list
The Quick view (see Finding and using an entry) is a hand-picked shortlist. You manage it under Manage -> Quick (the item in the Manage menu, distinct from the main-menu Quick view).
If the list is empty, press the joystick to add the first entry.
Choose an existing item in the list to act on it:
Insert - add another entry just before this one.
Append - add another entry just after this one.
Del - remove this entry from the Quick list (the entry itself is not deleted).
Type - set the default sending style for this Quick entry (the same styles as in Typing passwords to the computer), so choosing it from the Quick view can go straight to, say, typing the password.
Import - load many passwords from a computer
Manage -> Import brings a whole set of entries in from a password manager on the computer at once, over the USB-drive connection. The Seclave KeePass 2 plugin is one tool that sends entries this way.
First choose how imported entries should be combined with what is already on the device:
Interactive - go through conflicts one at a time; for each entry that clashes with an existing one, you choose whether to keep the copy already on the Device or the Imported copy.
Merge - add the imported entries alongside the existing ones; where a label already exists, the entry already on the device is kept.
Overwrite - replace the device’s current entries with the imported set.

Choosing the merge mode before the import starts.
The Seclave then appears as a USB drive. Use the computer tool (for example the KeePass plugin) to write the entries to it, then follow the on-screen steps and eject the drive when done.
Warning
Overwrite removes the device’s current entries before loading the imported ones. Take a backup first (see Backup and restore) if you are not sure.